

How to Use a Tarot Digital Journal to Deepen Your Practice
A Tarot Digital Journal is more than a notebook — it’s a sacred space to record your readings, reflect on your intuition, and track your growth as a reader. By writing down your daily pulls, moon phase spreads, and personal insights, you create a powerful archive of your tarot journey. Here’s how to use a digital journal to deepen your connection with the cards

celestial girl learning tarot
Tarot is more than pulling a card and reading a guidebook — it’s a journey of self-discovery. One of the best ways to connect with your cards and your intuition is through journaling. That’s where a Tarot Digital Journal comes in.
Whether you’re a beginner just learning the cards or an experienced reader looking to track deeper patterns, this journal gives you the structure and space to build a meaningful practice. Here’s how to make the most of it:
✨ 1. Start With Daily Draws
Each morning (or evening), pull a single card and write down your first impressions. Don’t worry about “getting it right” — the goal is to capture your thoughts, feelings, and intuitive hits. Over time, you’ll start to notice themes and insights you might have missed otherwise.
🌑 2. Explore Moon Phase Spreads
The journal includes New Moon and Full Moon spreads so you can align your readings with lunar cycles. These are perfect for setting intentions, releasing what no longer serves you, and reflecting on your progress each month.
🌟 3. Track Your Spreads and Patterns
From 3-card spreads to yearly overviews, the journal gives you layouts to record every reading. Writing down your interpretations helps you spot repeating cards, recurring messages, and patterns that deepen your understanding.
🪞 4. Reflect and Grow
The Tarot Reflection section is where the magic happens. Look back at past readings, note how events unfolded, and see how your intuition has developed. This builds confidence and strengthens your connection with the cards.
📓 5. Use It Your Way
You can use this digital journal on apps like GoodNotes, Notability, or any PDF annotation tool, or print it out to create a physical workbook. It’s flexible, so you can adapt it to your own tarot journey.
🌙 Ready to Begin Your Tarot Journaling Practice?
The Tarot Digital Journal is designed to guide you step by step — with space for daily draws, major arcana notes, spreads for every occasion, and reflections to help you grow.
👉 Click here to get your Tarot Digital Journal
Start today and let your journal become the bridge between your intuition and the cards.

How to Launch Your First Digital Product in 2025
Wondering how to start an online business with digital products? The 14-Day Digital Product Blueprint is your roadmap from idea to launch. In just two weeks, you’ll learn how to pick your niche, create your product, set up your website, market your business, and launch with confidence. Includes a bonus list of 100 digital product ideas to inspire your journey. Perfect for creators, entrepreneurs, and side hustlers ready to build income online.
f you’ve ever thought about starting an online business, digital products are one of the easiest and most profitable ways to get started. No inventory, no shipping, and endless potential for passive income. But the big question is: where do you start?
Here are a few helpful tips to guide you on your journey:
🌱 1. Start With Your Niche
Instead of trying to sell to everyone, focus on a specific group of people you can help. Ask yourself:
What am I good at?
What problems can I solve?
What topics light me up?
The clearer your niche, the easier it is to create products people actually want.
✨ 2. Solve a Real Problem
Digital products sell best when they solve something tangible. Think:
A planner to stay organized
A guide to help someone learn a new skill
Templates that save people time
If your product makes someone’s life easier, it will sell.
🛠️ 3. Keep It Simple
Don’t overcomplicate your first digital product. You don’t need a huge course or a massive ebook. Start with something small but useful — like a mini-guide, checklist, or template. You can always build bigger products later.
💌 4. Build an Email List Early
Even if you don’t have a product yet, start collecting emails. This gives you a warm audience to launch to once your product is ready. A simple freebie (like a checklist or short guide) is enough to get people signed up.
🎉 5. Don’t Wait for “Perfect”
The truth is, your first product won’t be perfect — and that’s okay. The most important step is launching. You’ll learn, improve, and create more over time.
🌟 Want a Step-by-Step Roadmap?
If you’re ready to stop dreaming and actually launch, my 14-Day Digital Product Blueprint walks you through everything you need — from finding your niche to building your product, setting up your website, marketing, and launching in just two weeks.
You’ll also get 100 digital product ideas to spark inspiration and help you choose the right path.
EFT Tapping: How I Discovered It and Why It Changed My Life
I discovered EFT Tapping almost by accident, but it quickly became one of the most powerful tools for self-healing I’ve ever tried. In this post, I share my journey into EFT, how it transformed my confidence and self-acceptance, the science behind why it works, and a simple tapping sequence you can follow to invite more love into your life.
I first came across EFT (Emotional Freedom Technique) online. I kept seeing people practice it and share their incredible results, so I thought—why not give it a try?
At first, it felt a little unusual, tapping on different points of my face and body while repeating statements. But as I practiced, something shifted. I began to notice small changes in my mood, then bigger shifts in how I felt about myself. I decided to go deeper and enrolled in a course with the Center of Excellence. That’s when everything clicked: EFT wasn’t just easing my anxiety—it was helping me transform the way I showed up in the world.
The results became tangible:
My anxiety eased and I felt calmer in my body.
I started showing up with more confidence.
I felt more self-acceptance and compassion toward myself.
This wasn’t just about “feeling better”—it was about reprogramming the way my mind and body responded to stress, doubt, and fear.
How EFT Works (Mind + Body Connection)
EFT, or tapping, is like a blend of modern psychology and ancient wisdom. Here’s the science and energy behind it:
Mind: Tapping sends calming signals to the amygdala—the part of the brain responsible for the fight-or-flight response. It tells the nervous system, “You’re safe.” Over time, it helps rewire limiting beliefs and reduce the emotional intensity tied to negative thoughts.
Body: Each tapping point is linked to energy meridians, similar to acupuncture. By tapping on these points, you help release blocks and restore balance in your system.
Science: Studies have shown EFT lowers cortisol (the stress hormone), which explains why it can feel like a wave of relief washes over you after a session.
In short: EFT helps you shift old patterns in both your body and your subconscious mind.
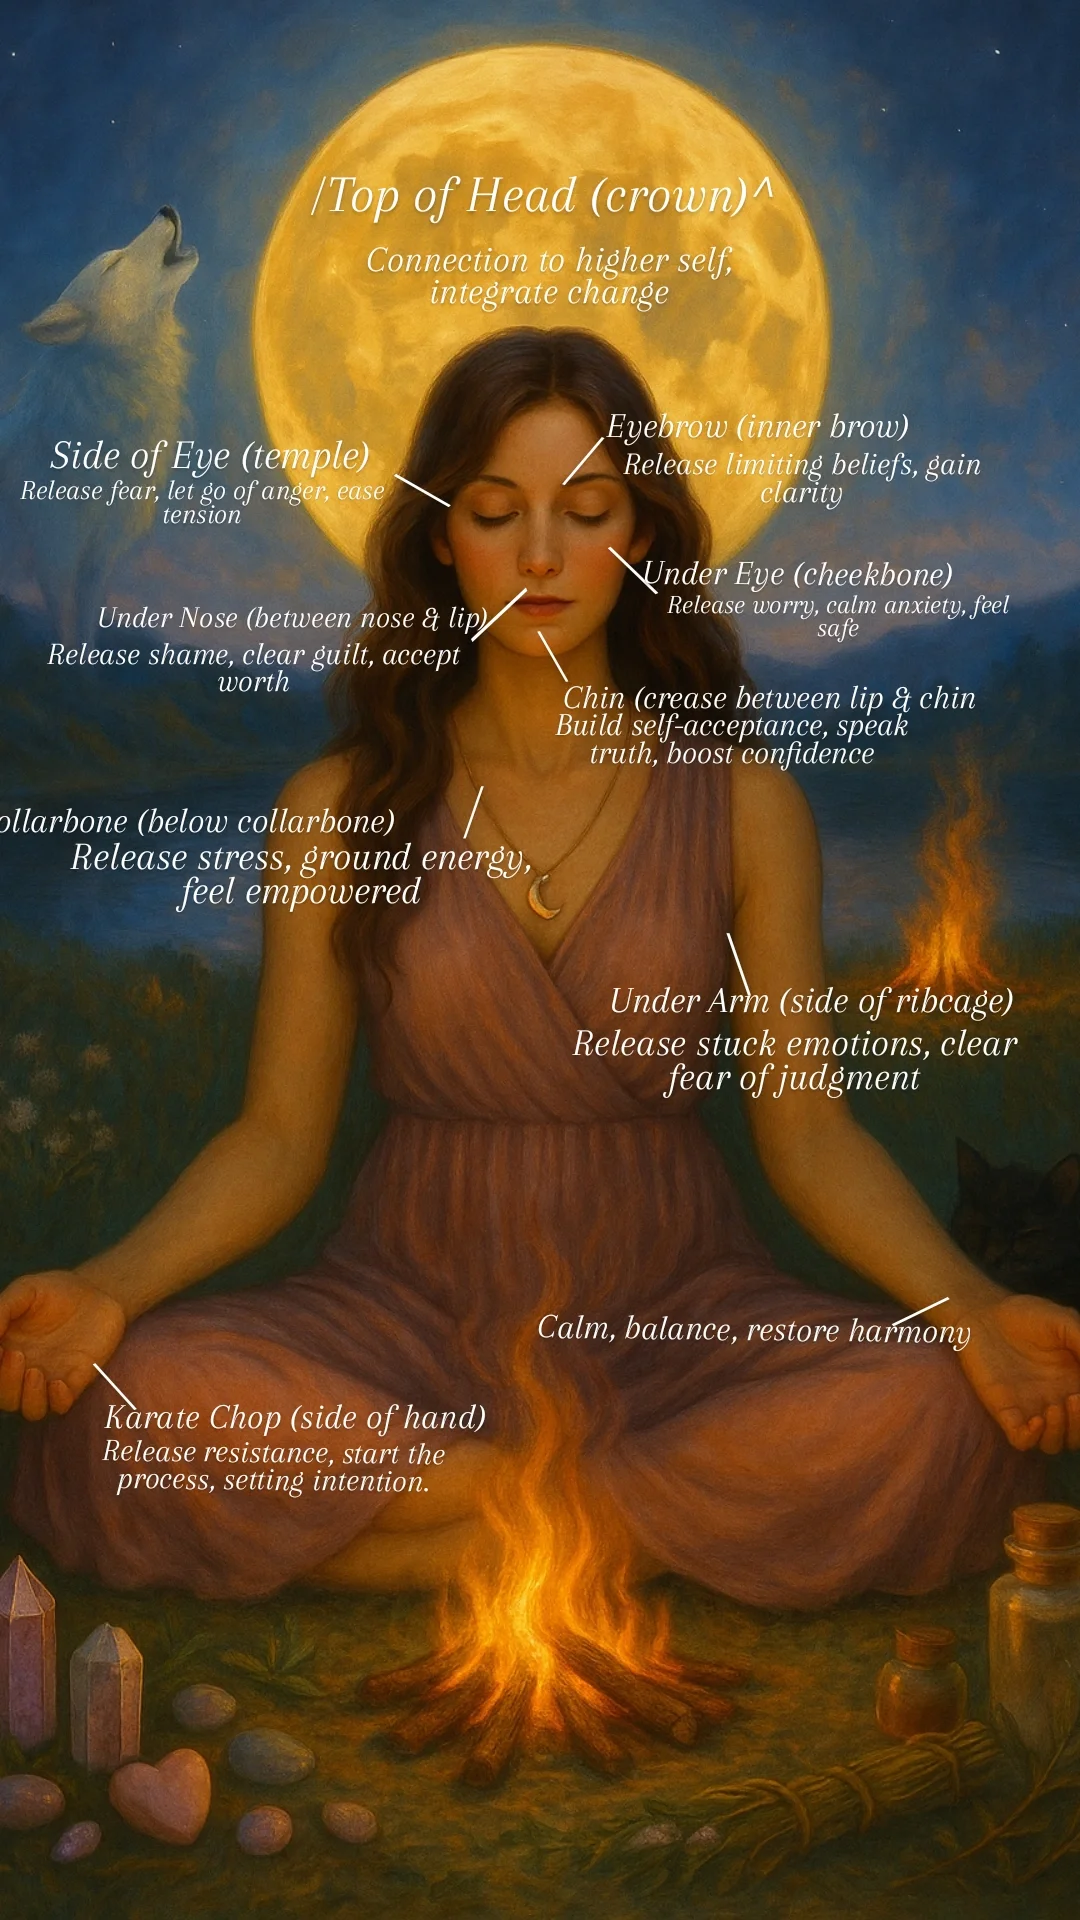
EFT Sequence for Love & Self-Acceptance
Here’s a simple sequence you can try at home. As you tap through each point, repeat the phrases (or adjust them so they feel true for you).
Karate Chop (side of hand):
Even though I sometimes doubt myself, I deeply and completely love and accept myself.
Even though I carry old feelings of unworthiness, I choose to release them now.
Even though part of me still struggles, I know I am safe and supported.
Eyebrow: I release self-doubt.
Side of Eye: I let go of fear and judgment.
Under Eye: I release the old stories of not being enough.
Under Nose: I free myself from guilt and shame.
Chin: I choose compassion for myself.
Collarbone: I open to love and acceptance.
Under Arm: I allow my true worth to shine.
Top of Head: I am love. I am acceptance. I am enough.
Take a deep breath. Place your hands over your heart and say:
“I am worthy of love. I am safe to be myself. I am free.”
Closing Thoughts
EFT has become more than just a practice for me—it’s a way of reconnecting with myself. It’s simple, it’s free, and it only takes a few minutes to start shifting how you feel.
If you’ve never tried EFT before, start with this love and self-acceptance sequence and notice how your body feels afterwards. Do it daily for a week, and see what changes.
I’ll be sharing more EFT sequences for abundance, confidence, and clarity soon, so keep an eye out. In the meantime, I’d love to hear your thoughts—have you tried EFT before? What shifts have you noticed?

Full Moon in Pisces – September 7, 2025
✨ On September 7, 2025, the Full Moon in Pisces shines a light on release, healing, and intuition. This dreamy lunation calls us to let go of old stories and create space for new blessings. Learn how to work with its energy through a gentle ritual of reflection, water magic, and surrender — and discover how to carry this lunar wisdom forward with my Horoscope Greeting Cards for all 12 zodiac signs: anad3signs.com/greeting-cards 🌙

A Time to Release, Heal, and Flow Into the New
On September 7, 2025, at 20:08 local time, the Full Moon in Pisces illuminates the night sky, inviting us into a moment of surrender, softness, and soulful release. Full Moons are always climaxes of energy — they reveal what has grown since the last New Moon and highlight what needs to be acknowledged, celebrated, or let go. In Pisces, the final sign of the zodiac, this lunation carries a spiritual undertone: it asks us to dissolve rigid structures, release emotional baggage, and trust the flow of life.
The Astrology of This Full Moon
Pisces is a water sign ruled by Neptune, the planet of dreams, intuition, and the mystical. Under this energy, boundaries blur, emotions swell, and hidden truths rise to the surface. This Full Moon shines a light on the intangible — our spiritual growth, our compassion for ourselves and others, and the unseen patterns we carry.
Opposite the grounded Sun in Virgo, this Moon calls for balance between practical routines and spiritual surrender. Virgo’s analytical nature urges us to refine and cleanse the physical world, while Pisces reminds us that not everything can be planned — some things must simply be felt and released.
Spiritual Themes
Release of Illusions: Old stories, limiting beliefs, and false attachments may come up now, ready to be let go.
Heightened Intuition: Dreams, signs, and synchronicities will be especially potent — listen closely.
Healing Through Compassion: Pisces teaches that forgiveness, both for ourselves and others, is a gateway to freedom.
A Ritual for Release & Renewal

This ritual can be done on the night of the Full Moon or within 48 hours after.
1. Set the Space: Find a quiet place. Light a white or blue candle (Pisces colors) and some cleansing incense or herbs such as sage, lavender, or frankincense.
2. Ground Yourself: Sit comfortably and take deep breaths. Visualize roots anchoring you to the earth, steadying you as the watery energy of Pisces flows.
3. Reflect & Write: On a piece of paper, write down what you wish to release — fears, doubts, old habits, or painful attachments. Be honest and compassionate with yourself.
4. Water Release: Fill a bowl with water (symbol of Pisces). Read your list aloud, then fold the paper and submerge it in the water, visualizing those burdens dissolving away.
5. Affirm the New: Place your hands over your heart and say: “I release what no longer serves me. I open my spirit to healing, compassion, and new beginnings.”
6. Close with Gratitude: Thank the Moon, yourself, and the Universe for holding space. Snuff out the candle and pour the water into the earth if possible.
Final Thoughts
This Full Moon in Pisces reminds us that letting go is also an act of love. By clearing space within our hearts and minds, we invite new blessings to flow in. Trust the currents, surrender to the mystery, and remember: endings are the fertile ground for beginnings.
🌌 Want to bring this lunar magic into your everyday life?
You can explore my Horoscope Greeting Cards Collection — designed for all 12 zodiac signs — perfect for gifting, journaling prompts, or adding a touch of astrology to your altar. ✨ Find them here:
https://anad3signs.com/shop-yBHwC-XZDq3-DrfiE-hvv96-3HdLU-hmuJ4

Solve a Problem, Make Money: Turning Everyday Frustrations Into Income
💡 Most successful businesses don’t start with a genius idea — they start with a simple problem. The truth is, people don’t pay for “cool” products, they pay for solutions. If you can take a frustration (yours or someone else’s) and turn it into a fix, you’ve already unlocked the formula: solve a problem, make money.
Solve a Problem, Make Money: Turning Everyday Frustrations Into Income
They say money follows value — and value often hides inside problems. If you’ve ever caught yourself thinking “There should be an easier way to do this…”, congratulations: you’ve just stumbled onto the seed of a business idea.
The truth is, people don’t pay for products or services just because they’re shiny or trendy. They pay because those things solve a problem, save time, or make life better.
Here’s how you can turn that principle into a real way to earn:
---
1. Start With Problems You Already Know
The best place to look? Your own life.
What do you complain about most often?
What tools or services do you wish existed?
Where do you feel frustration or waste time?
👉 If you’re annoyed by it, chances are others are too — and they’ll happily pay for a fix.
---
2. Listen Closely to Others
Pay attention to conversations with friends, coworkers, and online communities.
What are people always asking for help with?
What hacks or shortcuts do they wish they had?
Sometimes the money-making idea is hiding in the comments section of Reddit or a casual rant from your best friend.
---
3. Small Solutions Can Pay Big
Not every solution has to be groundbreaking. Some of the most successful businesses came from simple fixes:
Meal prep kits: solving “I don’t have time to cook.”
Noise-canceling headphones: solving “I can’t focus.”
Apps that split bills: solving “Math is awkward at dinner.”
Don’t overlook the small, “boring” problems — they’re often universal and profitable.
---
4. Validate Before You Build
Before pouring time and money into your idea:
Ask people if they’d actually pay for it.
Post in online groups to gauge interest.
Try a quick prototype, freebie, or beta version.
If no one bites, you saved yourself a headache. If people are excited — you’re onto something.
---
5. Choose the Right Format
Not all solutions need to be physical products. Consider:
Digital products (guides, courses, templates) — low cost, high scalability.
Services (coaching, freelancing, repairs) — quick to start, cash flow friendly.
Physical products — great for recurring needs (consumables, accessories, daily use items).
Pick the format that fits your resources and skills.
---
6. Focus on Value, Not Perfection
Don’t let overthinking stall you. The goal isn’t to invent the next iPhone overnight — it’s to help someone, now. If your idea saves people time, stress, or money, they’ll see the value even if it’s not perfect yet.
---
✨ Key Takeaway: Money is just energy exchanged for value. If you can solve a problem — even a small one — and deliver real relief, people will gladly pay you for it.
The next time you feel frustrated, don’t just complain — take notes. You might be looking at your next income stream.

3 Digital Journals That Keep Me Sane (and Organized)
Between life, work, and chasing big dreams, I need tools that bring calm, not chaos. These are the three digital journals I keep returning to—simple, pretty, and actually useful. Each one is a quick download from my shop so you can start right away.
1) One Day at a Time – Self-Care Journal (PDF)

self care planner
When your brain is doing cartwheels, this is the gentle structure that brings you back to earth. Daily prompts help you check in with energy, emotions, wins, and what you need next—no perfection required.
Great for: mood tracking, stress release, tiny daily rituals.
Grab it: Shop → Self-Care Journal (look for “One day at a time self-care journal PDF”).
2) Digital Food Planner

digital meal prep journal
Meal planning, but make it easy. Map out breakfasts/lunches/dinners, jot a quick grocery list, and note what actually worked so next week is even faster. Saves money, saves time, saves brain cells.
Great for: simple weekly plans, reducing “what’s for dinner?” panic, mindful eating.
Grab it: Shop → Digital Food Planner.
3) 2026 Manifestation Journal & Calendar (Digital)

2026 manifestation journal
Set intentions, track synchronicities, and keep your goals visible all year long. It blends a full 2026 calendar with space for affirmations, gratitude, and wins—so your dreams aren’t just “out there,” they’re scheduled.
Great for: daily intentions, momentum, aligning actions with goals.
Grab it: Shop → 2026 Manifestation Journal.
Prefer undated? You’ll also find the Undated Manifestation Journal in the same section.
How I Use Them Together
Morning (2 minutes): one intention in the Manifestation Journal.
Afternoon (1 minute): glance at the Food Planner so dinner isn’t chaos.
Evening (3 minutes): a quick check-in in the Self-Care Journal—what worked, what needs love tomorrow.
Quick FAQ
Are these printable or tablet-friendly? Both. Download once, use on iPad/Android tablet (Goodnotes/Notability/Xodo) or print at home.
Refunds? Digital items are non-refundable—peek at the previews to be sure you love them.
Ready to start?
Browse the full collection here: anad3signs.com/shop.
If you try one, tag me—seeing your setups makes my whole day. ✨

Meal-Planning Made Simple: Using the Digital Food Planner

digital meal planner ingredient basket
If you’ve ever stood in the kitchen wondering what to cook for dinner again, you know how frustrating it can be. Between busy workdays, family schedules, and unexpected life stuff, planning your meals can feel like another chore. That’s exactly why I created my Digital Food Planner — a simple, beautiful, and reusable tool that helps you organize your meals without the overwhelm.
Why Meal Planning is a Game-Changer
Meal planning isn’t just about eating healthy — it’s about saving time, money, and mental energy. With a plan in place, you:
Avoid last-minute takeaways
Reduce food waste
Make grocery shopping faster and easier
Stay on track with your health goals
How to Use the Digital Food Planner
Download & Open — Once you grab your copy, you can use it digitally on your tablet or print it for the fridge.
Fill in Your Week — Add your breakfast, lunch, dinner, and snacks. I love colour-coding for variety.
Link to Your Shopping List — As you plan, jot down ingredients so your grocery run is quick.
Rinse & Repeat — Because it’s reusable, you can keep your favourite meal plans for the future.
Pro Tips for Success
Plan around your busiest days (keep those for quick meals)
Use one or two “theme nights” each week (like Pasta Night or Soup Night)
Batch-cook freezer-friendly meals
Incorporate seasonal produce to save money and eat fresh
Ready to Ditch Dinner Stress?
You can get the Digital Food Planner here and start meal planning with ease today.
digital meal index

Understanding Reiki Symbols: A Simple Guide to Their Meaning & Uses
Reiki symbols are more than just ancient drawings — they are keys that help unlock the flow of energy within us. Whether you’re new to Reiki or simply curious about how these symbols work, understanding their meaning can bring a deeper sense of clarity and balance to your everyday life. Each symbol carries a unique frequency, designed to support healing, emotional release, and energetic alignment. In this guide, I’ll walk you through the most commonly used Reiki symbols, how they are applied in practice, and how you can begin to connect with their energy in a simple, approachable way — even if you’re just starting your journey
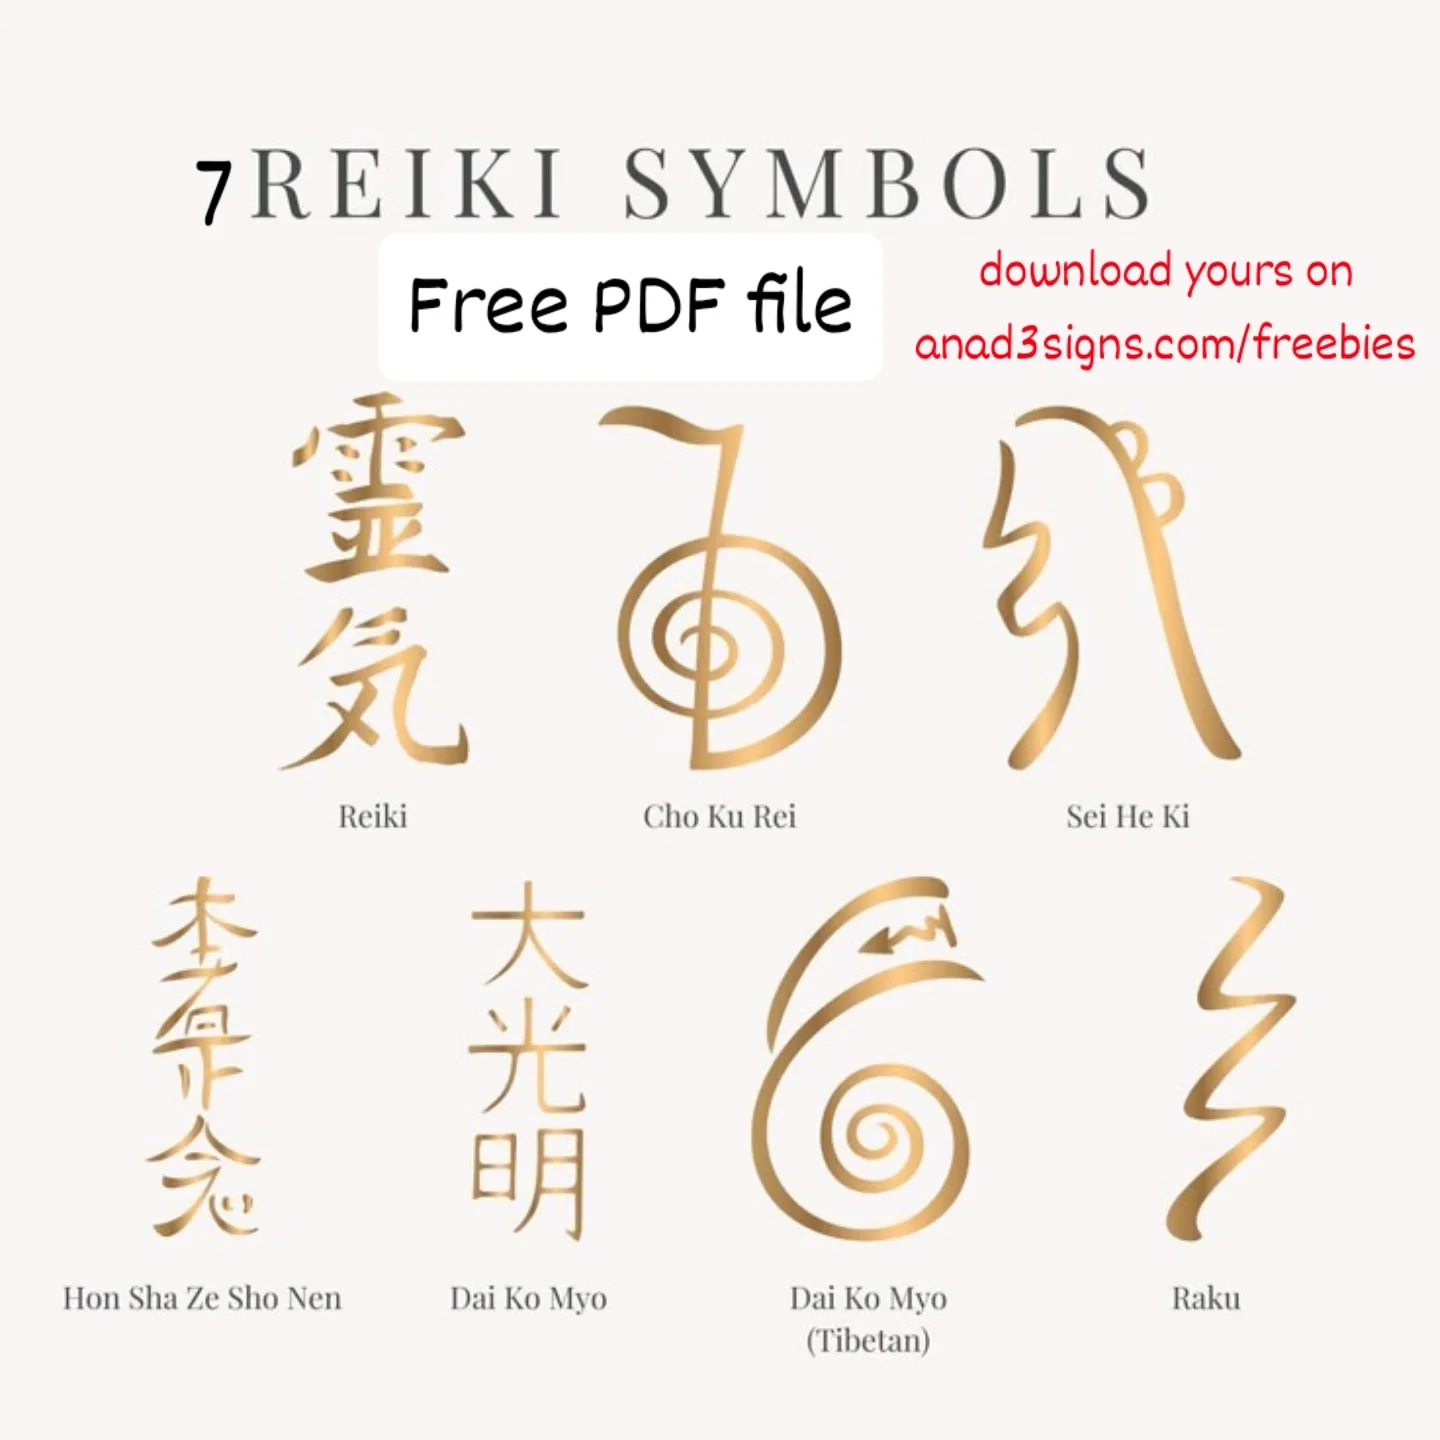
7 reiki symbols
Are you ready to harness the healing power of energy and bring balance into your life? As a certified Level 2 Reiki Practitioner, I’ve experienced first hand how Reiki can transform not only your physical well-being but also your emotional and spiritual health. That’s why I’m offering a FREE downloadable PDF of the 7 Essential Reiki Symbols — so you can start your own journey of energy healing today.
What is Reiki?
Reiki is a Japanese energy healing technique that promotes relaxation, reduces stress, and encourages emotional and physical healing. The word "Reiki" translates to "universal life energy," and it’s this very energy that flows through every living being. By channeling Reiki energy through the hands, practitioners can help clear energetic blockages and restore balance to the body’s natural flow.
Benefits of Reiki & Energy Healing
Whether you’re new to energy healing or deep into your spiritual journey, Reiki offers a range of benefits that support your overall well-being:
Reduces Stress and Anxiety: Reiki promotes a state of deep relaxation, calming the mind and reducing the mental clutter of daily life.
Enhances Emotional Clarity: Energy healing helps release emotional blockages, allowing you to process and let go of lingering emotional pain.
Boosts Physical Healing: By improving energy flow, Reiki supports the body's natural healing processes and can help alleviate physical discomfort.
Strengthens Spiritual Connection: Reiki encourages a deeper connection to your higher self, promoting mindfulness and inner peace.
Improves Sleep Quality: Regular Reiki sessions can help calm an overactive mind, leading to more restful sleep.
Why the Reiki Symbols Matter
In Level 2 Reiki, symbols are introduced as tools to amplify the flow of healing energy. Each symbol holds a unique vibration and purpose, such as emotional healing, distance healing, or intensifying the overall energy flow. Understanding and working with these symbols can greatly enhance your Reiki practice.
That’s why I’ve created a FREE Printable PDF featuring the 7 Essential Reiki Symbols. Whether you’re a practitioner or simply interested in exploring energy healing, these beautifully designed symbols can serve as a visual guide and energetic anchor in your daily practice.
Download Your Free Reiki Symbols PDF
You can download your free Reiki Symbols printable PDF here
Simply print it out and use it as a powerful tool in your meditation space, Reiki sessions, or daily affirmations.
Embrace the flow of universal energy and allow these sacred symbols to support your healing journey.
Stay tuned for more resources, as I continue to share tools and insights from my own Reiki practice to support your spiritual growth.
Blessings, Ana
P.S.: Don’t forget to share this free resource with fellow energy healers and friends who could benefit from Reiki’s gentle power!

📸 How I Turn My Photography Into Greeting Cards & Art Prints (Step-by-Step)
Taking photos has always come naturally to me. It’s never something I plan — it’s more like a spontaneous act. Whether I’m walking by the sea or exploring a quiet path, when the light hits just right or the scenery feels alive, I reach for my camera.
Over time, I realized that these moments — captured through my lens — weren’t just memories. They had the potential to become something more: art to display, share, and gift.
In this post, I’ll walk you through exactly how I turn my photographs into greeting cards and art prints, using a simple, minimalist approach that still feels intentional and high-quality. I’ll also share how I make my products both accessible and personal.
🧭 Step 1: Capturing the Shot (Trusting Your Eye)
I use a Canon Rebel T7, but I truly believe the best camera is the one you have with you. Sometimes it’s my phone, especially if the moment is fleeting.
Here are a few tips I follow when shooting:
Don’t overthink the setup. Natural lighting and organic framing are often better than over-posing.
Shoot during golden hour (just after sunrise or before sunset) for the softest, most flattering light.
Take multiple shots, even if it looks perfect — small shifts in angle make a big difference later.
Look for emotion or story, not just beauty. A quiet harbor, a forgotten tower, a winding path — these tell stories people connect with.
🌿 Tip: Don’t wait for the “perfect” location — some of my favorite shots happened unexpectedly during everyday walks.
🎨 Step 2: Designing the Cards (Using Canva for a Minimalist Touch)
Once I’ve selected a photo I love, I move into the design phase. I use Canva, a free and easy-to-use design platform that works beautifully for product mockups and layout design.
Here’s how I design my greeting cards:
Keep it minimal. I prefer a clean aesthetic — the photo takes center stage.
I include a small line of text in elegant font at the bottom of the card, usually the name or location of where the photo was taken. It adds context and makes the piece more personal.
For the inside of the cards, I usually leave them blank, so they can be used for any occasion — or add a soft message, like “thank you,” depending on the design.
🖼️ You can view some of my finished card designs here:
👉 Thank You Card – Neutral Design
👉 Funchal Port Card – Travel-Inspired
👉 Renvyle Tower Card – Irish History & Landscape
🖼️ Step 3: Creating Art Prints (Offering Framed & Unframed Options)
For art prints, I want customers to have flexibility — both in style and price — so I offer two versions:
Unframed Prints — Ideal for customers who want to use their own frame or keep it budget-friendly. I use high-quality lustre or matte paper through my print-on-demand partner to ensure vibrant color and durability.
Framed Prints — These are ready to hang and make beautiful gifts. The frame style is kept simple (black or natural wood) to let the photo shine.
🖼️ View examples from my shop:
👉 Framed Print – Nature Landscape
👉 Unframed Print – Nature Photography
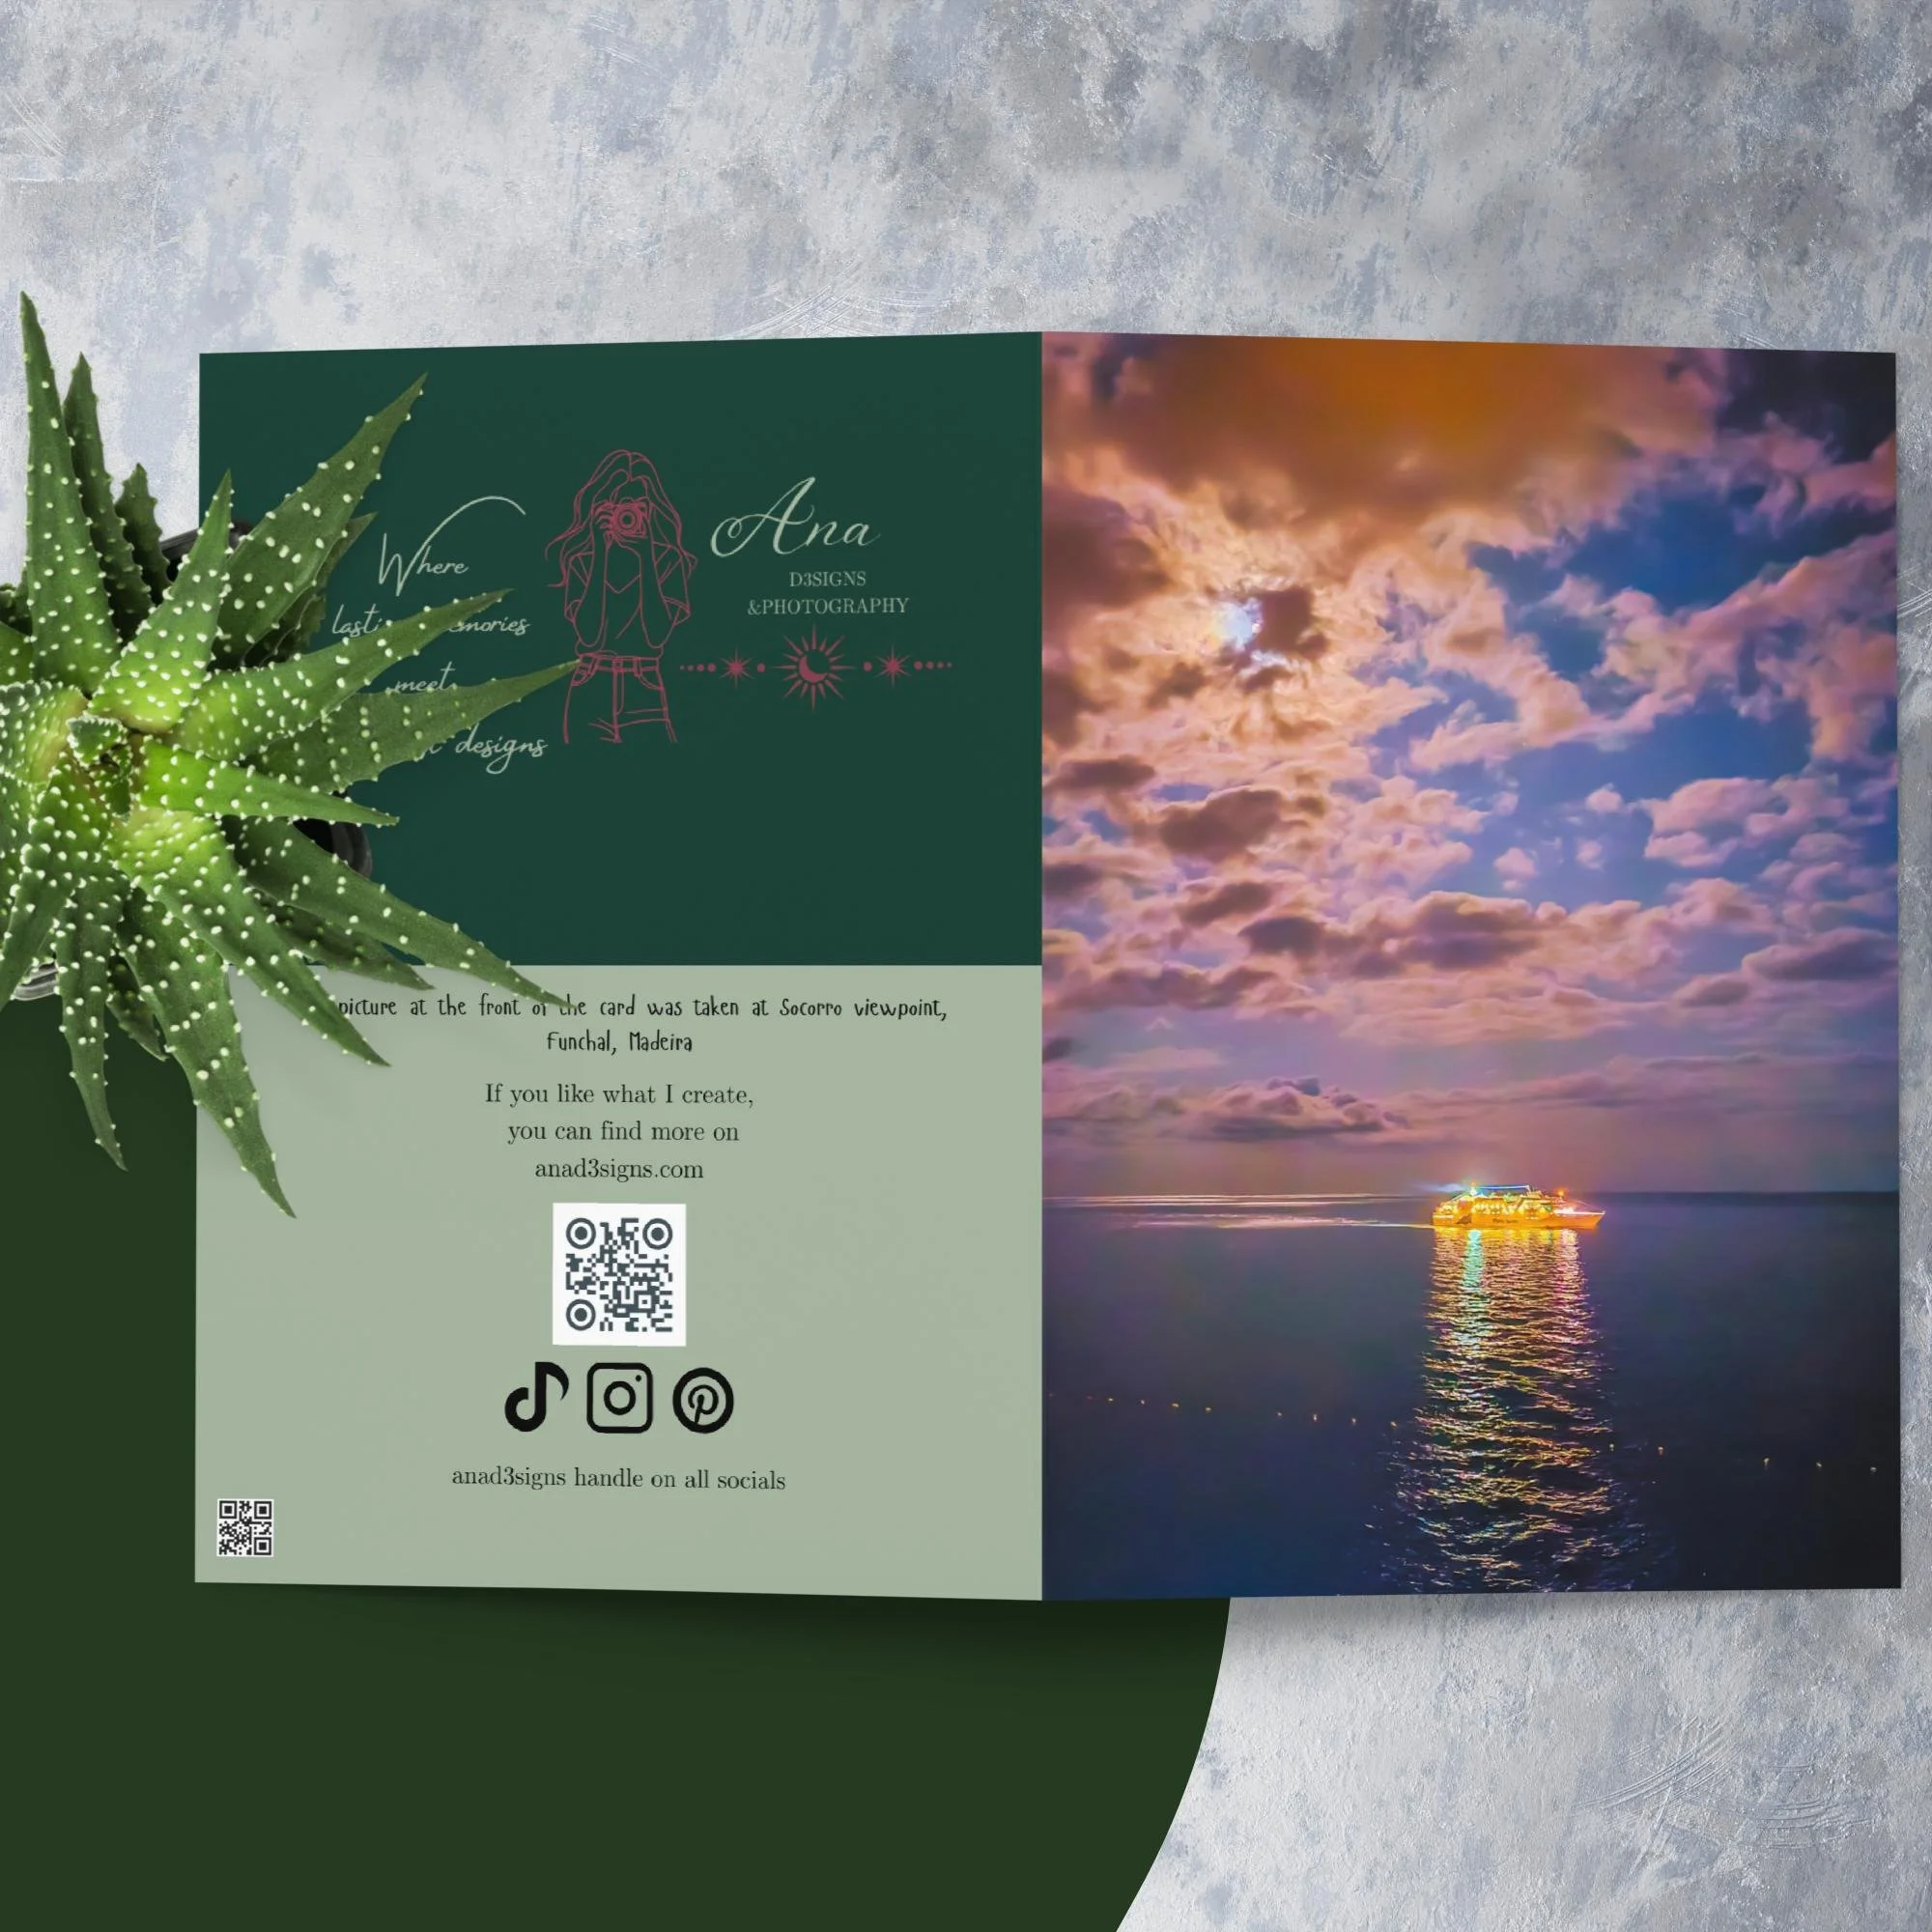
🖋️ Designing the Back of My Greeting Cards (Branding with Intention)
One small but important detail I include in all my greeting cards is a custom-designed back. I created this design in Canva as well, and I use the same layout (or slight variations) across my entire card collection to keep things cohesive.
The back includes:
My brand name and logo
A small message or signature line (depending on the card)
And most importantly: QR codes that link directly to my website and Instagram
This way, anyone who receives the card can easily discover more of my work, follow along with my journey, or even shop if they love the design. It’s a soft but powerful way to turn every card into a tiny ambassador for my brand — while still keeping the focus on the message and the photo itself.
🌿 Tip for fellow creators: If you're selling physical products, include at least one QR code on your packaging or branding materials — it's simple to make and super effective for connection and traffic.
💡 Final Tips for Creatives:
If you’re thinking of turning your own photos into products, here are a few tips from my experience:
Start with what you have. You don’t need a professional setup to create meaningful work.
Use Canva or similar tools for layouts — it makes designing so much less overwhelming.
Don’t overdo the branding. Let your photo speak for itself.
Offer variety, but keep it cohesive. Two options (framed/unframed) is enough to give customers choice without overwhelming them.
Keep your listings personal. Share where the photo was taken or what it means to you — people love to know the story behind the art.
💬 Why I Love This Process
There’s something really grounding about capturing a moment, then slowly turning it into something tangible that others can enjoy. It’s my way of blending creativity, intention, and healing — and it allows others to bring a piece of that energy into their space or gift it to someone they love.
I hope this gave you insight and inspiration — whether you're a creative looking to try something new, or someone who simply loves supporting small handmade shops.
🛒 Feel free to explore more of my prints and cards in my shop!

🌼 My Homemade Herbal Tea Blend – From Garden to Jar🌼
🌿 Homemade Herbal Tea Blend for Gut Health & Energy 🌼
Learn how I made this calming herbal tea using calendula, basil, and thyme — all harvested and dried from my own garden. This blend supports digestion, immunity, and emotional balance.
In this blog post, I share the full recipe, the benefits of each herb, how I charge it with crystal energy, and how my herbalist course helped me start blending at home.
Perfect for anyone on a natural healing or holistic lifestyle journey!
Over the past few weeks, I’ve been slowly harvesting small batches of herbs from my garden — calendula blossoms, sprigs of thyme, and sweet basil leaves. Today, I finally created a beautiful blend from them, and I couldn’t be more proud. It’s a small jar, but it holds the energy of the sun, the care I put into growing each plant, and the deep intention behind every step.
🌿 Harvesting & Drying the Herbs
I harvested everything on a dry morning, just after the dew had lifted. Calendula was in full bloom, glowing with bright orange petals that seemed to hold sunlight. The thyme and basil were lush and fragrant, ready to be snipped.
After harvesting, I gently cleaned the herbs and left them to air dry in a cool, shaded area with good airflow. I’ve learned that patience is key — drying slowly helps preserve not only the color and aroma, but also the healing properties.

thyme, basil and calendula drying
Once dried, I ground them lightly using a mortar and pestle — just enough to break them down and blend their textures, while still keeping some of the structure. The result is a mix that smells like summer and feels like magic.

crushing herbs with mortal and pestle
🍵 Why These Herbs?
Calendula – Known for its gut and skin-healing properties, calendula is anti-inflammatory, soothing, and supportive of the lymphatic system. Spiritually, it’s associated with heart healing and solar energy.
Basil – A gentle digestive aid and calming herb, basil lifts the spirit and brings clarity. Energetically, it’s linked to abundance, purification, and protection.
Thyme – Antibacterial, antiviral, and anti-fungal, thyme supports the immune system and clears out what no longer serves — both physically and energetically.

holistic tea blend
This blend isn’t just tea — it’s medicine, both for the body and the soul.
🔮 Charging the Blend with Crystal Energy
Because this blend is as much about intention and energy as it is about physical healing, I also like to charge it with crystals. After blending, I placed the jar on my selenite charging plate for several hours.
Selenite is known for its cleansing and high-vibrational properties — it clears stagnant energy and infuses objects with clarity and light. By placing the jar on the plate, I’m giving this blend an energetic boost, aligning it with peace, healing, and inner balance.
I love doing this when I create anything handmade or for ritual use. It turns the process into a sacred act — a moment of devotion to myself and to the healing path I’m on.

charging tea blend with crystals
✨ From Dream to Reality (One Jar at a Time)
This blend is just a small beginning, but it carries the seed of a much bigger dream: to one day have my own home, a little greenhouse, and shelves filled with jars of herbs I've grown and dried myself. Even though I’m not there yet, this moment — this tea — makes it feel closer.
Would you try a blend like this? Have you made your own herbal tea before?
I’d love to hear from you. Let’s keep growing, creating, and healing together 🌿

Why I’m Shifting My Business Toward a More Spiritual Path 🌿✨
For a long time, I tried to mold my business into something that made sense to others — something polished, practical, and easy to define. But the truth is, my heart has always been in a different place.
I’ve always loved talking about energy, healing, herbs, and soul work. But no one around me really shares those passions. In real life, I often feel like the “odd one out” — like I’m speaking a language only I understand. And that can feel incredibly lonely.
So I’ve decided: I’m no longer trying to make my work resonate with people who aren’t meant to hear it.
Instead, I’m shifting my business toward what truly lights me up — and speaking directly to the community that gets it. The ones who feel magic in herbs, healing in silence, and power in being real.
Reconnecting With My Own Path
Over the years, I’ve explored holistic health not because it was trendy or profitable — but because it helped me survive.
It helped me heal.
I even completed a holistic practitioner course simply because I loved it — not to impress anyone or get a certificate, but because I wanted to understand myself and the body on a deeper level. That same love is what led me to EFT, which I’m now studying to become a qualified practitioner. It’s already changed so much in my life, and I can’t wait to share it with others.
My Garden Is My Temple 🌻

Smudge bundles made from herbs I grew, harvested, and dried myself — each one carries love, purpose, and energy.
This past year, my garden has become one of my greatest teachers.
The sunflower you see here? I grew it from seed — just like the herbs I’ve harvested, dried, and bundled into smudge sticks. There’s something sacred about working with the Earth this way. It’s not just gardening — it’s ritual. It’s healing.
Each plant I grow carries energy.
Each petal, each leaf — part of a deeper journey back to myself.

My sunflower baby — grown from seed, just like this next version of me.

Herbs drying for teas, blends, and future rituals — this is what soul-led creation looks like.
What’s Next for My Business
From now on, I’ll be creating content, products, and tools that align with this path:
✨ A digital EFT tapping bundle to help you clear blocks and connect with your energy
🌿 Witchy, herbal content and maybe even spellwork tools
📸 Photography prints from my soul — nature-based, intentional, and sacred
💻 Blog posts and guides for other spiritual creatives walking this path
This isn’t just a rebrand.
This is me returning to myself.
If You're Still Reading...
Thank you.
If any part of this resonates with you — welcome. You’ve found a corner of the internet where your inner world is celebrated, not hidden.
And if you’re walking your own path of self-discovery, healing, and creative expression — I see you. I’m right here beside you. 🤍
4 affordable ways to practice self-care

Practicing self-care is an act of love towards yourself and others. Once your cup is filled you can give more of your love to the loved ones and be in a better headspace. Here are some free/affordable ways you can practice self-care everyday to regenerate your energy.
Start the morning with writing down everything that needs to be done- ahead of the day, helps you not only stay focused and organized, but it also frees up the mental load, which helps reduce anxiety. To start off, a pen and a piece of paper will do nicely. But if you are committed, there are journals that are made specifically for this, like this digital self-care journal One day at a time, that has a daily diary, medication, water and loads more trackers, a manifestation board, prompts and many other cool features, and all that for under 5 euros.
Taking small breaks- taking small breaks, going outside for fresh air, and just enjoying being in the present moment without screens and distractions, even for a few minutes can help clear your head and break from the routine and gain a fresh perspective.
Eat well -it is no secret that healthy has been proven to affect our mental health directly. I am not going to suggest anything extreme, just being mindful and present in the moment, when you make food choices, helps you be more connected with your body.
Take care of your space- just like with food, our environment is directly correlated with our mental well being. Taking small steps frequently to declutter and keep your environment tidy, light some incense or a candle and have soft lights for the evening to help you unwind, will make it easier to be more rested in the long run.
DISCLAIMER
the first product recommendation was a placement for my own product that I have designed with much love and care and that was tailored for people like me that forget to take time for themselves. I also designed the journal to be easy to bring with you (in your ipad/tablet) and is compatible with apps like penly, goodreads etc. Every like, share, comment or purchase help me a small artist (graphic designer) pay for some of the subscriptions to sustain this website and my other venture. Thank you for being here, I appreciate you.